
Practical photometric guide
How to Create a Warehouse Photometric Layout
To create a warehouse photometric layout, define the room and workplane, select a fixture using measured IES data, enter mounting and surface assumptions, place an initial fixture grid, calculate point-by-point light levels, then adjust spacing and review dark areas, uniformity and power before documenting the result.
Updated: August 6, 2026
What a warehouse photometric layout shows
A warehouse photometric layout estimates how light from selected luminaires reaches a calculation plane across a modeled space. It can show point-by-point footcandles, average and minimum values, fixture quantity, spacing and visual heatmaps. The result depends on the photometric file and every project assumption entered into the model.
- Footcandle: one lumen of light falling on one square foot of surface
- IES file: a standardized text file that describes measured luminaire light distribution
- Workplane: the horizontal or vertical surface where illuminance is calculated
- Uniformity: a ratio used to describe how evenly light is distributed across the calculation points
1. Gather the project inputs
Start with verified dimensions and operating conditions. Record the warehouse length, width and clear height; the luminaire mounting height; the workplane height; and the location of racks, equipment or open areas. Identify the target illuminance and any applicable code, owner or task requirements.
Do not treat a generic target as a substitute for project criteria. A picking aisle, bulk storage area, loading zone and detailed inspection station can have different visual needs.
- 1.Confirm room length, width and ceiling or structure height.
- 2.Confirm the luminaire mounting method and height above finished floor.
- 3.Set the workplane at the surface where the task occurs.
- 4.Document rack heights, aisle widths, obstructions and excluded areas.
- 5.Record target light levels and the source of that requirement.
2. Select the actual fixture and IES file
Use the IES file for the exact luminaire configuration being proposed. Wattage, optics, lumen package, shielding and mounting can change the distribution. A file from a similar-looking product is not reliable evidence for the selected fixture.
Confirm the manufacturer, catalog number and photometric test identity before calculation. In Lighting Studio, the fixture can come from a manufacturer-specific catalog or an uploaded IES file where that workflow is enabled.
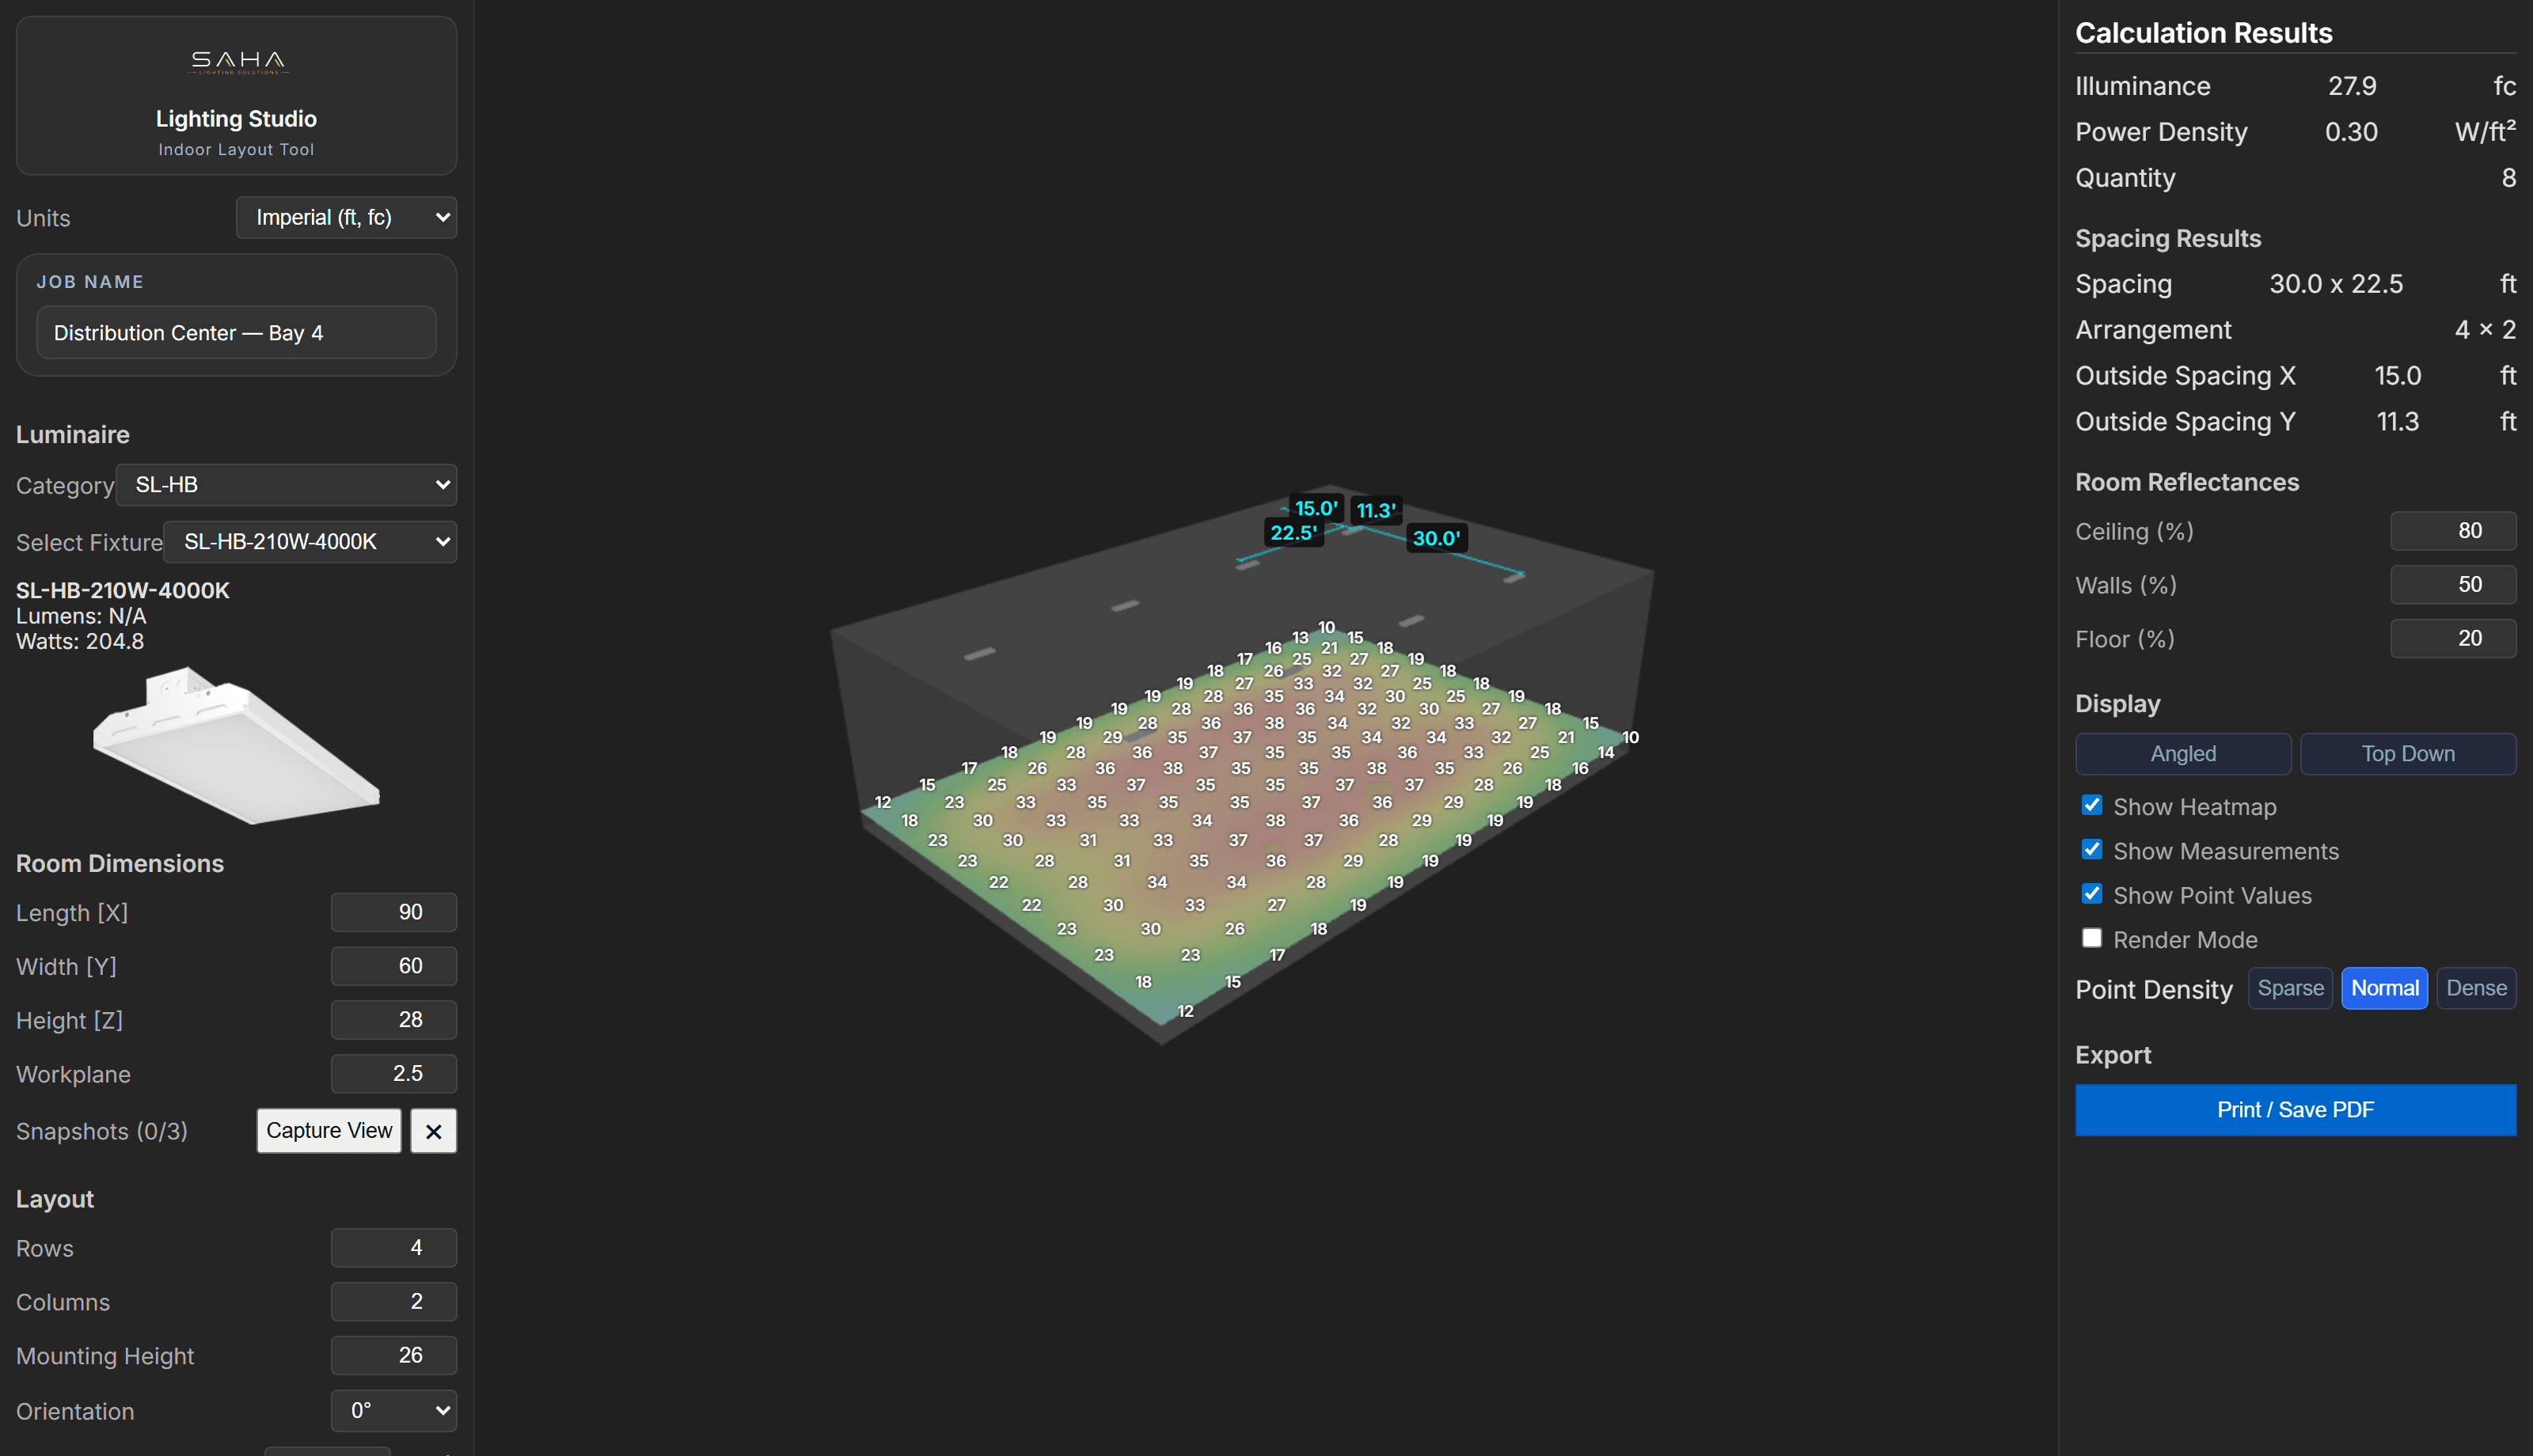
3. Model the space and assumptions
Enter the room geometry, mounting height and workplane. Set ceiling, wall and floor reflectances to project-appropriate values rather than leaving optimistic defaults. Warehouse surfaces, stored materials and dust can materially affect reflected light.
If racks or large obstructions are important to the task, use a tool and model detail appropriate to that risk. A simple open-room model cannot represent every shadow or vertical surface condition in a working warehouse.
4. Place a starting fixture grid
Choose a reasonable starting arrangement based on the building geometry, luminaire distribution and manufacturer spacing guidance. Align rows with the operational layout when practical. In racked areas, row placement relative to aisle centerlines often matters more than a perfectly symmetrical room grid.
- 1.Choose an initial row and column count.
- 2.Check setbacks from walls and ends of aisles.
- 3.Confirm fixture orientation for asymmetric distributions.
- 4.Keep the mounting height and photometric file unchanged while evaluating the first grid.
5. Calculate and read the results
Review more than the average. Locate the minimum values and see where they occur. Inspect the point-by-point grid and heatmap for dark bands, bright hot spots, excessive edge falloff and abrupt changes between rows. Check the uniformity metric required by the project, if any.
Example: two layouts can both average 30 footcandles, while one has a 4-footcandle dark zone and the other stays above 18. The average alone hides that difference. The point-by-point plan shows where the problem is.
6. Adjust one variable at a time
If the layout misses the project target, change one major variable and recalculate. You might adjust row spacing, column spacing, fixture count, optics, lumen package, mounting height or orientation. Changing several inputs at once makes it harder to understand why the result improved or degraded.
Also compare connected load or lighting power density when available. More light is not automatically a better design if it creates glare, waste or unnecessary energy use.
7. Review and document the final assumptions
Before sharing the layout, verify the fixture identity, dimensions, mounting height, workplane, reflectances, target values and calculation grid. Label the result as preliminary when it has not received the qualified review required for final construction or compliance decisions.
A useful report should make the assumptions visible, include the fixture count and arrangement, show point-by-point values or a heatmap, and give the reviewer enough information to reproduce the result.
Common warehouse layout mistakes
- Using an IES file from the wrong wattage or optic
- Calculating at the floor when the task occurs on a raised workplane
- Ignoring racks, equipment or other large obstructions
- Judging the layout only by average footcandles
- Using unrealistic surface reflectances
- Failing to confirm mounting height and fixture orientation
- Presenting a preliminary model as final engineering documentation
Frequently asked questions
What information is needed for a warehouse photometric layout?
At minimum, gather room dimensions, mounting height, workplane height, target light levels, surface assumptions and the exact fixture IES file. Rack and obstruction information may also be essential.
How many footcandles should a warehouse have?
There is no single value for every warehouse. The appropriate target depends on the task, occupancy, owner criteria and applicable standards or codes. Confirm the project requirement rather than copying a generic number.
Can Lighting Studio create warehouse layouts?
Yes. Lighting Studio supports indoor and warehouse-oriented preliminary layouts with fixture grids, mounting inputs, point-by-point values, heatmaps and reports.
Is a photometric layout a final electrical design?
Not automatically. Final suitability depends on project scope, input accuracy, code requirements and qualified review.
Related
Build a warehouse layout in your browser
Use the Lighting Studio trial to test a fixture grid, inspect point-by-point values and export a preliminary report.